Sonntag, 2. Oktober 2011

CSS3 LED icons

Here they are... pure CSS3 LED icons:

You may have to upgrade your browser if the LEDs aren't very shiny. In the meanwhile you can check out the source:

.led {
    display: inline-block;
    width: 12px;
    height: 12px;
    border-radius: 6px;
}

.led.yellow {
    background-color: #ffff00;
    background-image: radial-gradient(50% -5%, circle closest-side, #ffffee, #ffff00 110%);
    background-image: -webkit-radial-gradient(50% -5%, circle, #ffffee, #ffff00 110%);
    background-image: -moz-radial-gradient(50% -5%, circle, #ffffee, #ffff00 110%);
    box-shadow: 0px 0px 3px #ffff00;
}

.led.green {
    background-color: #00ff00;
    background-image: radial-gradient(50% -5%, circle closest-side, #eeffee, #00ff00 110%);
    background-image: -webkit-radial-gradient(50% -5%, circle, #eeffee, #00ff00 110%);
    background-image: -moz-radial-gradient(50% -5%, circle, #eeffee, #00ff00 110%);
    box-shadow: 0px 0px 3px #00ff00;
}

.led.red {
    background-color: #ff0000;
    background-image: radial-gradient(50% -5%, circle closest-side, #ffeeee, #ff0000 110%);
    background-image: -webkit-radial-gradient(50% -5%, circle, #ffeeee, #ff0000 110%);
    background-image: -moz-radial-gradient(50% -5%, circle, #ffeeee, #ff0000 110%);
    box-shadow: 0px 0px 3px #ff0000;
}

Mittwoch, 20. April 2011

Deobfuscating java projects

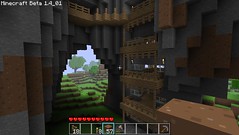
Lately I've been digging into minecraft. Normally digging into minecraft means something like this:

I was rather digging into something like this:

/*    */ import java.io.DataInputStream;
/*    */ import java.io.DataOutputStream;
/*    */ 
/*    */ public class a extends gc
/*    */ {
/*    */   public int a;
/*    */   public int b;
/*    */   public int c;
/*    */ 
/*    */   public void a(DataInputStream paramDataInputStream)
/*    */   {
/* 21 */     this.a = paramDataInputStream.readInt();
/* 22 */     this.b = paramDataInputStream.readInt();
/* 23 */     this.c = paramDataInputStream.readByte();
/*    */   }
/*    */ 
/*    */   public void a(DataOutputStream paramDataOutputStream) {
/* 27 */     paramDataOutputStream.writeInt(this.a);
/* 28 */     paramDataOutputStream.writeInt(this.b);
/* 29 */     paramDataOutputStream.writeByte(this.c);
/*    */   }

Obfuscated java code :-(

What is obfuscated code?

By obfuscating your java classes you want to prevent others from taking your source, modify it and release it again under another brand. There are tools which automatically obfuscate your code. These tools normally do the following things:

  • Put all artifacts (classes, interfaces, ...) into the default package
  • Rename all artifacts and members to something generic like 'a'

These changes make it very hard for humans to understand the meaning of some code. But there are a few things that can't be changed that easily during obfuscation:

  • Access modifiers
  • Types
  • Signatures in general
  • Import statements

What has all this to do with minecraft?

mojang is obfuscating it's minecraft releases so nobody can steal their code. Unfortunately this makes it very hard for developers to extend minecraft due to the lack of APIs within minecraft. So the community helped itself and created bukkit. bukkit is an API for minecraft. bukkit is so important just because of the minecraft obfuscation. With every minecraft release (major or minor) the signatures of all classes change. bukkit is the abstraction layer for the obfuscation changes.

But this means a lot of work for the bukkit developers [1]. They need to revert the minecraft obfuscation for every minecraft release manually.

The plan

Now there is a chance to make undoing the obfuscation more easily. But it will only work when the following conditions are met:

  • You got the deobfuscated source of a former version
  • The software is implemented iterative. So only relative small amounts of the code change during two versions.

With these assumptions you can statistically try to match artifacts from the old source with artifacts from the new obfuscated source. You just need to compare the things that don't change during obfuscation. Theres a big chance that the two artifacts with the most equality are actually the same artifact. This allows you to transfer the artifact's name and package from the old source into the new source.

The project

I like the idea of automatically deobfuscate java code. So I've hacked something and released it on github. java-deobscurify tries to find matching artifacts in the clear text and obfuscated source. java-deobscurify is still a work in progress. Let's say pre alpha... but I hope it will produce reasonable output in the near future.

References

  1. When will Bukkit be updated for Minecraft 1.5?

Mittwoch, 30. März 2011

Another minecraft rendering

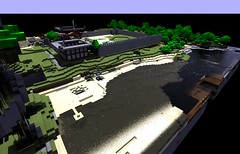
Another minecraft povray rendering got finished. For more details see my former blog post Rendering minecraft worlds with povray:

Montag, 21. März 2011

Rendering minecraft worlds with povray

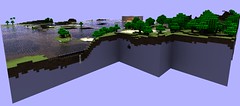
Lately I've been playing with the minecraft savegames. There's not much documentation about the savegame format [1] [2]. But I've managed to export some blocks and render them with povray. Here are the results:

References

  1. RegionFileCache.java
  2. RegionFile.java

Samstag, 19. Februar 2011

Headless HTML page rendering with phantomjs

What is phantomjs?

phantomjs is a headless browser which can render HTML pages into images. It uses a Webkit rendering engine. That's cool because the generated page images aren't missing any dynamically loaded javascript stuff. Event flash movies are shown as expected.

Building phantomjs

The phantomjs homepage contains some very useful hints about getting and building phantomjs. Read the comments at the end of the build instructions page if something doesn't work out for you. There are many useful hints.

Rendering my first page

phantomjs is controlled using javascript commands. You can launch your phantomjs javascript files from the commandline:

$ phantomjs myScript.js

phantomjs calls your script every time after a page is loaded. To react in different ways on different pages you have to track your current "state". You can persist your script's state in the var phantom.state. phantomjs restores the value of phantom.state even after another page is loaded. Other javascript variables disappear after loading a new page. Initially the state is empty.

To load a page call phantom.open(url). phantomjs will load the page below the specified URL and execute your script after the page's DOM is loaded.

The (in my opinion) coolest function is phantom.render(path). phantomjs will save a "screenshot" of your current page to the specified path on your hard drive. The path's file extension defines the image file format. Your viewport's size can be defined by setting phantom.viewportSize.

After you're done with your phantom things you have to call phantom.exit(returnCode) to quit. The returnCode is passed as status to the parent process.

Now putting all that functions together in a script gives us the following:

if(phantom.state.length === 0){
  phantom.state = '0_home';
  phantom.open('http://www.mini.de');
}
else if(phantom.state === '0_home'){
  phantom.viewportSize = {width: 800, height: 600};
  phantom.sleep(2000);
  phantom.render('home.png');
  phantom.exit(0);
}

The result after executing the script is a screenshot of www.mini.de in a file named 'home.png'. The image will show the main stage with a flash movie and a footer with three dynamically loaded HTML fragments. You can see the result below:

Clicking links

"Clicking links" like a humanoid user is simulated by firing mouse click events. The following listing defines the clickElement(id) function which can be used to "click" elements. This allows us to execute simple page flows.

function clickElement(id){
  var a = document.getElementById(id);

  var e = document.createEvent('MouseEvents');
  e.initMouseEvent('click', true, true, window, 0, 0, 0, 0, 0, false, false, false, false, 0, null);

  a.dispatchEvent(e);
}

if(phantom.state.length !== 0){
  // save screenshot for every page / state
  phantom.viewportSize = {width: 800, height: 600};
  phantom.sleep(2000);
  phantom.render('screen_' + phantom.state + '.png');
}

if(phantom.state.length === 0){
  phantom.state = '0_home';
  phantom.open('http://www.mini.de');
}
else if(phantom.state === '0_home'){
  phantom.state = '1_config';

  clickElement('quicklink_id1');
}
else if(phantom.state === '1_config'){
  phantom.exit();
}

The script will load the URL http://www.mini.de which is the home page. After loading the home page the element with the ID 'quicklink_id1' will be target of a click event. The element with the ID 'quicklink_id1' should be the 'MINI KONFIGURATOR' link in the footer.

Asserting stuff

Within phantomjs scripts you can access you page's DOM, the global javascript variables and global javascript functions. This enables us to do some kind of unit testing.

I'm extending the listing once more:

function clickElement(id){ ... }

function fail(msg){
 console.log(msg);

 phantom.exit(1);
}

function assert(condition, msg){
 if(condition){
  return;
 }

 fail(msg);
}

if(phantom.state.length !== 0){
 phantom.viewportSize = {width: 800, height: 600};
 phantom.sleep(2000);
 phantom.render('screen_' + phantom.state + '.png');
}

if(phantom.state.length === 0){
 phantom.state = '0_home';
 phantom.open('http://www.mini.de');
}
else if(phantom.state === '0_home'){
 phantom.state = '1_config';

 clickElement('quicklink_id1');
}
else if(phantom.state === '1_config'){
 assert(document.getElementById('cake'), 'I am missing the cake!');

 phantom.exit();
}

Check this out: phantomjs returns a status code of 1 when the assertion fails. This can be used to do some custom post processing in the shell:

$ phantomjs myScript.js && echo 'Test successful' || echo 'Test failed'

Further information

For further information see the following pages. They are sorted by what I think is important.